Jumaat, April 22, 2011

Cereal Box Sandals

Cereal Box Sandals - Step 1
Materials

* Empty cereal box
* Scissors

* Pencil
* Duct (or packing) tape


Instructions

Step 1 Cut out the shoe shapes plus as many straps as your child wants. Tape the straps in place using masking, duct, or packing tape. For the best fit, wrap and tape the straps and soles together around the child's bare feet. Kids can leave the sandals au naturel or decorate them with whatever their feet desire. Note: these sandals are best as loungewear as they may be slippery on certain surfaces.

Pembinaan Portfolio Murid Prasekolah


Sila dapatkan di sini
http://www.sendspace.com/file/katnvu

Isnin, April 04, 2011

How to Teach Kids Vowels


Video Transcript

After we go through the alphabet sounds chart, the next thing to do is to isolate the five vowels because vowels are very very difficult to distinguish for young children. As easy as it is for us because we've been doing it for years and years, a lot of children, they hear the aa, the ee and the ii, especially of the first three and they smush them up and aa, just eh, sounds like the same thing to them, especially when they're reading so we're going to teach them to isolate the finite distinct differences between these five letter sounds and so we'll start by having them repeat after you, say a, aaa, like in aaapple, eh like in eeelephant, ii, like in ii, ohh, like in octopus, uh, like in umbrella. Now be very very strict with this, don't allow them to go uh if they mean oh, don't allow them to, if you hear the slightest sound that doesn't quite sound like the vowel you want, make them do it over, say it again, make them do it over, drill it into them. The more you do in the very beginning, the more it won't be an issue down the road and they won't be reading the word r e d as rad or rid, they'll read it as red. So what I do, I have them say each one and I have them do each one perfectly and then I go back and I say, now what is this sound say? Aa, if I get a good aa, like in apple, I like it. Eh, if I get a good eh is good, eh like you're at the dentist office, eh, keep your mouth open, you can even draw a face there where that's the open mouth. And then ii, sometimes I say pretend you're hitting the stomach and then I jump around and I say tell me this one, aa, eh, ii, and I go a little faster and faster if they can keep up with it until they get it like that and they see the letter and they know the sound and they don't have to think and they don't mush it.

How to Teach Action Words to Kindergarten Children


Video Transcript

It's important for us to teach action words to children so that they know some common verbs that they can recognize while they're reading. One of the best ways to teach action words to children would be to create a word wall of action words. Now this is just simply any space that you have in your classroom that you can place the walls in alphabetical order so that they can see what words belong. Another thing that I would do when teaching action words is to find a picture that illustrates the action, and place it on the card as well. Here are a few action words to help get you started. Keep in mind that when teaching action words or verbs to young children, you should emphasize that any word is an action word is something that can be completed or an action that can be done. These words are ones that are easily acted out by children. A great game that you can play with the students is to provide them with an action doll that you then practice in making the action doll complete into the actions. After the child has been able to master the actions that appear on this list, things like run, jump, hop, you can then move on to action words that not quite as easily displayed. These might include playing, shopping, buying, some other words that you would want to introduce to them as well. Remember the best way to teach these to them is through repeated exposure and allow them the opportunity to act out the words on their own. When teaching the action words to children, the best way to do it is to introduce them in one to two words per week. I would teach them to the child by first acting the word out on their own, and then have each of the children mimic your actions. Repeatedly do this over and over while displaying the word to them until the children have mastered the word. Then the word may go on the wall so that it may be referred to when either reading or writing as part of a group or independent lesson.

How Can a Teacher Teach Phonics to Young Children?


Video Transcript

One of the largest tasks that kindergarten teacher has in the classroom is teaching phonics to young children. Now, phonics actually means the associating a letter sound with a letter. For example, M would say mmm, and C would say kuh. So you not only want to teach children not only to recognize the letter but to recognize the sound that the letter makes. I would say that the best ways to introduce phonics to young children would include introducing one to two letters per week. This way, they're not overwhelmed and they're able to grasp what the letter, as well as it's sound. I would also recommend not introducing the letters in the order of the alphabet because often, child will rely simply on their knowledge of the alphabet song to complete their letters. I would try to introduce it in a mixed up fashion. Another tip that I would have for you in introducing phonics to young children would be to teach the short vowel sounds first. Disperse the vowels in there so maybe introduce four or five consonant and then a vowel. And I would say after every eight to ten letters, take a couple, take a week or so to review those and recap before you move on. Repetition is thee best way to introduce letters to children. Show it to them in every way, shape and form. Surround this learning centers that you may have in this classroom with these letters, create letter collages, do some hands on activities. You can actually teach these letters to the kiddos using hands on materials such as play-dough, practicing writing the letters in sand, just so they understand and thee entire time you'll want to repeatedly tell them the sound a letter makes. After they've mastered each of the letter individual sounds, you can start working on blending them together.

How to Teach Vowel Sounds to Kindergartners


Video Transcript

When teaching letters to young children, take plenty of time to cover each of the five vowels. These are very important for children. Oftentimes when children begin writing they'll leave out the vowel sounds in the middle. I like to call these the middle mystery letters. Take the time to show the children the sounds that each of the vowels make. I like to refer back to the classic letter people when I use the vowel sounds. When I practice A I always have my children make an A with their hands like they're sneezing, and we always say Ahhh-choo, so they learn that Ahhh sound belongs with A. When learning the letter E we like to pretend that we're exercising so the key - the children always go Eh, eh, exercise as they're learning that E says eh. I is one of my favorite letters to teach because the children have a lot of fun. We always teach children that I says "i" and we always go itchy, itchy, i-i-i, as if we're scratching all over our bodies. When we practice the letter O I always tell children that it's the sound that you make at the doctor's office, you always open up and say Ohhhh, and you can say that your mouth makes an O, so when they say the word mop, their mouth is in the shape of an O. The last vowel that you'll want to teach them is the letter U and we always pretend we're putting uh, uh, up our umbrella. So that uh, uh, uh will constantly be reinforced. It's best to teach the children the short vowel sounds first. These are the ones that they'll use more commonly in their three letter words that they'll learn. After the children have mastered their short vowel sounds, then you'll want to take the time to introduce the long vowel sounds. Tell the children that the vowels say their name when it's in a long vowel, this is the difference between being at and rake. Teach the children that the vowels can say either short or long and they'll have to use other visual clues to help them. When they're ready you may even choose to introduce the concept of a silent E that often makes the letter say its name. But again, begin with the short vowel sounds, they're easiest for the kiddos to master at first.

Fish

What You’ll Need:
  • large round uninflated balloon
  • funnel
  • 1/2 cup flour
  • pencil with eraser
  • permanent marker

Craft Image

How to Make It:

  1. Stretch the open end of an uninflated, large round balloon over the small end of a funnel.

  2. Pour about 1/2 cup of flour into the funnel and balloon. Use the eraser end of a pencil to force the flour into the balloon. Add more flour to the funnel, a bit at a time, filling the balloon as much as you can.

  3. When you can’t force any more flour into the balloon, hold the balloon by the neck and remove the funnel.

  4. Tie a knot in the neck of the balloon and rinse off the extra flour.

  5. Using a permanent marker, draw eyes, a mouth, gills, and fins on the fish.

  6. To help yourself relax when you feel frustrated or nervous, squeeze your frustration fish and then relax your hand. Keep alternating between squeezing the fish and relaxing your grip until you feel calmer.

Hippo storage box


  • Plastic-foam balls, two 2"
  • Wiggle eyes, two
  • Acrylic paints: purple, pink, white
  • Dimensional paint: black, pink
  • Pushpins, two
  • Craft Glue
  • Paintbrush
  • Putting it all together
    1. Glue plastic-foam balls (eyes) on center top of egg carton. Insert pushpins through carton, securing eyes on top.
    2. Paint outside of carton and eyes purple and inside of carton pink. Let dry.
    3. Glue wiggle eyes on eyes.
    4. Paint “teeth" white. Use black dimensional paint to outline nostrils. Let dry.
    5. Tuck treats, notes, and other special wishes inside box for teachers or friends!
  • Ahad, April 03, 2011

    Plastic Bottle Crafts

    Plastic Bottle Crafts


    The idea is super easy. Here's what you'll need:

    Materials

    • Empty 2 liter plastic bottles
    • White glue
    • Scissors
    • Markers
    • Acrylic paints
    • Paint brushes
    • Sandpaper
    • Stickers
    • Skewers

    Instructions:


    1. Cut the plastic bottle one-third of the way down from the top. Sand the bottle using sandpaper

    Plastic Bottle Crafts


    2. Mark at least 5 "petals" using a waterproof marker. Cut along the lines to form "petals".

    Plastic Bottle Crafts


    3. Coat with a layer of white glue and let dry.

    Plastic Bottle Crafts


    4. Paint and decorate the petals using acrylic paints, waterproof markers and other stickers and glitter.

    Plastic Bottle Crafts


    5. Poke a small hole through the bottle cap. Place a skewer through the hole and screw back onto the bottle.

    Paper bag puppets


    Materials:


    Instructions:
    1. Print and cut puppets (Owl or Green Sea Turtle) along solid lines. Color.


    2. Glue body onto paper bag as shown.


    3. Glue head onto paper bag bottom flap as shown. Your puppets are pau (finished)!

    Rabbit

    Step 1

    Step 2

    Step 3

    Step 4

    Step 5

    Step 6

    Step 7

    Step 8

    Rabbit Crafts

    Materials:

    an egg capsule, a pair of scissors, Glue, pen, Wiggle Eyes

    Step one:

    Step two:

    Step three:

    Step four:

    Step five:

    Step six:


    Step eight:

    A pet rabbit’s diet typically consists of unlimited Timothy hay, a small amount of pellets, and a small portion of fresh vegetables.

    Rabbits are social animals. Rabbits as pets can find their companionship with a variety of creatures, including humans, other rabbits, guinea pigs, and sometimes even cats and dogs. Rabbits do not make good pets for small children because they do not know how to stay quiet, calm, and gentle around rabbits. As prey animals, rabbits are alert, timid creatures that startle easily. They have fragile bones, especially in their backs, that require support on the belly and bottom when picked up. Children 10 years old and older usually have the maturity required to care for a rabbit.

    Buggy Mobile

    http://crafts.kaboose.com/swf/350x255_eggmobile3_rdax_65.jpg

    What you'll need:

    • 18 place cardboard egg carton
    • Scraps of colorful patterned papers (wallpaper samples, old greeting cards) or construction paper
    • Acrylic paints: red, orange, brown, light blue, green, purple, yellow, white and pink
    • Scissors
    • 2 black skinny chenille stems
    • 9 flat-backed heavy pebbles, marbles, or other object
    • White yarn
    • 2 heavy twigs or craft dowels
    • 9 medium black pom poms
    • 18 small wiggle eyes
    • White craft glue
    • Acrylic sealer spray
    • Paintbrush
    • Hot glue gun

    How to make it:

    1. Remove the lid of the cardboard egg carton and save for another project. Place bottom of egg carton upside down and paint two sections with each color noted above (i.e. 2 red, 2 orange, 2 brown, etc). Repeat for a second coat and let dry. Spray all painted cups with acrylic sealer spray. See image.
    2. Cut the egg carton sections apart. Trim around the sections so that all you have left are colored cups. See image.
    3. If using patterned paper, most likely the backside of the paper is blank. If this is the case, fold the patterned paper in half, pattern on the outside. Put a layer of glue in between and stick together. This will create a piece of patterned paper that is patterned on both sides. If using construction paper this step is not necessary.
    4. Cut leaf-shaped wings from the paper.
    5. Separate the colored egg cups so that you have two groups of nine cups, one of each color.
    6. Turn one group of colored cups over, set the other group aside.
    7. Squeeze some white glue into each of the cups that are turned upward. Place a flat-backed marble into each cup and allow time for the glue to dry. This will give each bug enough weight that they will hang nicely on your mobile and will cut down on the lines tangling together. It will also help the bugs to “look” downward so that they are seen from the ground.
    8. Cut 9 pieces of yarn about 18” long each.
    9. Onto each of the egg cup halves with the marble in them, glue a black pom pom to the closed (bottom) end. Now pair up your colored egg cups.
    10. To assemble each bug body you will need a pair of the same colored egg cups, a set of paper wings, an 18” piece of yarn and your hot glue gun. Pipe a layer of hot glue onto the outer open edge of the egg cup with the marble in it, place the wings onto the glue, the yarn in the middle of the open cup at the top, and then the other egg cup goes on last. Repeat these steps for each bug.
    11. Now that the bodies are assembled you can glue the wiggle eyes onto the black pom poms.
    12. Cut the black chenille stems into 2” pieces. Bend the ends or twist them around a thin handled paintbrush. Put a dot of hot glue on the straight end and push into the top of the pom pom. Repeat for the other antenna. See image.
    13. Cut another piece of yarn about 12” in length. Crisscross the two dowels and wrap with yarn to secure, add a dot of glue to reinforce. Be sure there is enough yarn left over to tie a loop at the top to hang your mobile from.
    14. Tie each bug onto the dowels, two on each ‘arm” and one in the middle. Stagger the lengths and tie in place. When you have them where you want them, trim the excess. See image.

    Tips:

    • You can decorate your bugs even more by painting on stripes or adding dots.
    • If you use construction paper, kids can decorate the paper wings with stickers, markers, glitter, etc.
    • Try recycling old speaker wires for the antennas instead of chenille stems.

    Yarn Bug


    bug_yarnbug.gif (24117 bytes)
    You need:

    Instructions:

    Make a pompon by wrapping yarn around floppy disk (or heavy cardboard) as least 100 times. Cut a 6" piece of yarn and slide it under wrapped yarn. Tie tightly into a double knot. Turn floppy over and cut completely through yarn on this side. Turn yarn blob sideways and smooth down strands.

    Ask on adult to slice off the bottom of the Styrofoam ball so it stands on end. Cover the top and sides of the ball with tacky glue. Separate the strands of the pompon to fit the Styrofoam egg up inside. Press pompon into place. Arrange yarn.

    Cut pipe cleaners in half. Poke through yarn and into Styrofoam ball. Bend four for legs. Gently curl the two for antennae. Glue two white pompoms for eyes, and two pink pompoms for antennae tips. Punch holes out of craft foam and glue on all around bug. Glue two black holes on pompom for pupils on the eyes.

    Alien Yarn Bug

    You need:
    Optional:

    You can use these as substitutes on items above:

    Try our bug part kit. It includes a Styrofoam ball, foamie hands, foamie feet, two 20mm wiggle eyes and pipe cleaner.

    Instructions:

    Make a pompom by wrapping yarn around a 5" piece of cardboard at least 100 times. Mix colors or use all one color. Cut a 6" piece of yarn and slide it under wrapped yarn. Tie tightly into a double knot. Turn cardboard over and cut completely through yarn on this side. Turn yarn blob sideways and smooth down strands.

    Press Styrofoam ball onto a hard surface to flatten bottom. (You can also use an egg carton section.) Cover the top and sides of the ball with tacky glue. Separate the strands of the pompom to fit the Styrofoam ball up inside. Press pompon into place. Arrange yarn.

    Print any patterns your bug might need. Staple all around patterns onto craft foam or felt as listed in the supply list. Cut out pieces. Glue the bottom of the Styrofoam ball on to the foam feet. Glue on eyes. For optional arms, cut the pipe cleaner in half. Glue on hands. Poke the pipe cleaners into the bug for arms. Bend at the elbows. Glue on the wiggle eyes.

    Cut two small pieces of pipe cleaner for antennae. String a pom bead on each end. Bend to hold in place. Push into top of head.

    Science Yarn Bug


    You need:
    Optional:

    You can use these as substitutes on items above:

    Try our bug part kit. It includes a Styrofoam ball, foamie hands, foamie feet, two 20mm wiggle eyes and pipe cleaner.

    Instructions:

    Make a pompom by wrapping yarn around a 5" piece of cardboard at least 100 times. Mix colors or use all one color. Cut a 6" piece of yarn and slide it under wrapped yarn. Tie tightly into a double knot. Turn cardboard over and cut completely through yarn on this side. Turn yarn blob sideways and smooth down strands.

    Press Styrofoam ball onto a hard surface to flatten bottom. (You can also use an egg carton section.) Cover the top and sides of the ball with tacky glue. Separate the strands of the pompom to fit the Styrofoam ball up inside. Press pompon into place. Arrange yarn.

    Print any patterns your bug might need. Staple all around patterns onto craft foam or felt as listed in the supply list. Cut out pieces. Glue the bottom of the Styrofoam ball on to the foam feet. Glue on eyes. For optional arms, cut the pipe cleaner in half. Glue on hands. Poke the pipe cleaners into the bug for arms. Bend at the elbows. Glue on the wiggle eyes.

    Fill test tube with colored water. Cap. Glue fingers of one hand around the test tube. Glue on a plastic fly.

    Sheep Egg


    Courtesy of hard-boiled eggs, vibrant egg dye, a cute pipe cleaner stand, and some glued-on details (paper ears, pom-pom nose, and so on), this critter is an Easter favorite.

    Want to make the entire crop of egghead critters? Find instructions for the rest of the creatures at our Easter egg decorating party.

    Materials
    • eggs
    • newsprint
    • egg dye
    • paper towels
    • birthday candles or crayons
    • glue
    • cotton balls
    • brown paper
    • black marker
    • pipe cleaners
    Instructions
    1. Color Hard-boiled Eggs: Before you begin decorating, cover your worktable with newsprint. Set out plastic cups with assorted colors of prepared egg dye, either homemade (For each color, stir one cup of hot water and one teaspoon of white vinegar in a plastic cup. Then stir in 10 to 20 drops of concentrated food coloring) or store-bought. Have a roll of paper towels on hand and plenty of hard-boiled white eggs. Let the kids take turns submerging eggs into the dye until the eggs reach a desired shade. Gently blot excess dye with a paper towel. Set the eggs atop plastic bottle caps to dry. For eyes and spots, draw circles on the eggs with a birthday candle or crayon before submerging them in the dye.

    2. Sheep: To make this brown egg in sheep's clothing, glue on cotton balls and brown paper ears. Draw on eyes with permanent black marker.

    3. Craft Pipe Cleaner Legs: Set the decorated animal on a pipe cleaner stand. To make one, bend a pipe cleaner into an oval and twist it closed, using the excess as a tail. Cut a second pipe cleaner in half. Wrap one half around the back of the oval to form the back legs; wrap the other half around the front to create the front legs. Bend the ends into feet.

    Fluffy Sheep


    pompom Shaun the sheep


    There's something ironic about making a sheep from wool, but it does have a certain obvious ring about it. This FREE download includes the template for the wool rings you’ll need to make your pompom sheep and special image printouts (ready to be cut out) for the head and legs (lower down on this page). Don't worry if you don't have white or cream coloured wool, pompom sheep come in all the colours of the rainbow.
    . . . You could make a whole farm of sheep, just like Gromit’s friend Shaun and his gang, and what’s really cool about pompoms, is that you can really shear them (ok, trim them with scissors) to make them look as shorn as you want. Look what happened to our pompom sheep when we took our kitchen scissors to it! If you really want to make your pompom fluffy sheep look just like Shaun, before you stick the legs on your pompom sheep, have had a look at our latest advanced model of Shaun the Sheep. All you need is an old sock and a glue gun and your sheep will have a woolly jumper to keep him warm, just like Shaun’s.

    Shaun the sheep></span><br />                                                          <span class=
    pompom made from a plastic carrier bag
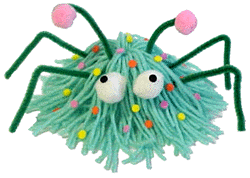
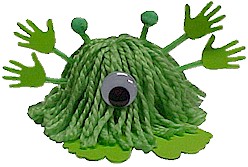
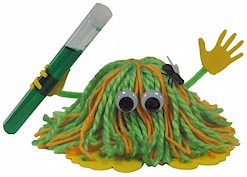
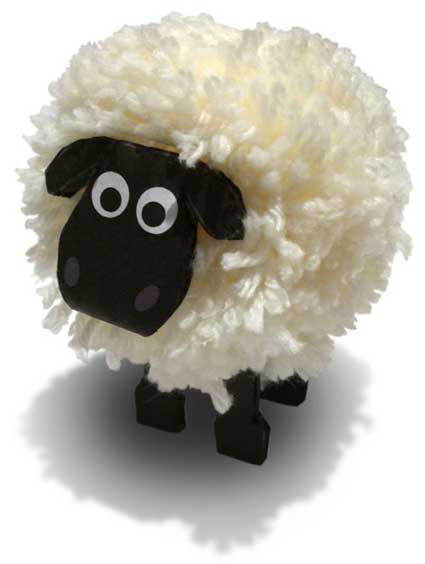
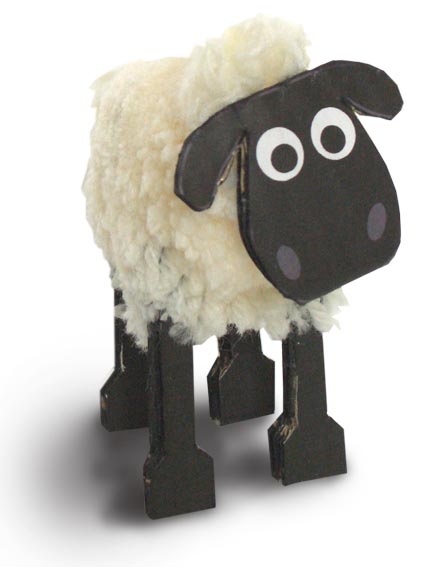
And now you don't even need wool to make a pompom, so you can get going on this project right away! An orange sheep... I don't think so, but then plenty of plastic carrier bags come in white, and if you use a black bin liner (refuse sack) then you really could make the black sheep of the family. Yes, a great way to reuse those plastic grocery bags, is by using them to make your pompoms. If you tie off the pompom with more plastic bag, then you can still recycle the finished pompom as if it was a normal plastic bag. You can also use black, white or green dustbin liners, or sandwich bags, which come in a range of subtle colours. Plastic bag pompoms will work for any of the Funky Pompom projects on dadcando. To make them all you do is replace the wool steps with the plastic bag. To make it easier to thread, you might want to cut the bag into wide strips, but as long as you can thread the bag through the centre of the discs then it's ok. A plastic bag pompom has a glossy slippery finish that is much softer than you would imagine and is a good alternative to wool.


    The pompom instructions and printable graphic templates are so simple to follow. They give amazing results and are available in either A4 or US Letter formats, just click on the size you need to download.

    Craft Stick Pansy Picture

    You Need:

    Instructions:

    Paint pieces and set aside to dry. Assemble with tacky glue. Let dry. Trim cardboard to cover the back. Run a bead of glue along bottom and both sides of cardboard. Leaving top open to slide in photo. Secure to back of frame. Glue on an easel.

    Tip for group craft:

    Dye pieces ahead of time to keep mess and time to a minimum. You can do this by soaking the wooden pieces in traditional fabric dye dissolved in water or try soaking in concentrated kool-aid. You can even use dried out markers. Just remove the pads from inside the barrels and place in a tub of water with wooden pieces.

    Candy Rose

    You need:

    Our prepack makes 1 chocolate kiss rose.

    Instructions:

    Cut and stack three 6" squares of pink cellophane. Hold two candy kisses together, lining up the flat bottoms, and wrap the kisses with the cellophane. Twist the cellophane to secure. Hold wrapped kisses against the end of the wooden skewer and wrap tightly with a green pipe cleaner, winding down the stick. Add more pipe cleaners as necessary. Add some glue to secure if desired.

    Cut three leaves from craft foam with decorative edge scissors. Glue behind the rose bud. Cut a heart from pink craft foam. Punch a hole and write your message. String a ribbon through the hole and tie onto the rose. Make a bow.


    Retro Window Watchers

    foam_sixties.gif (8636 bytes)

    You need:

    Instructions:

    Print patterns for Smilely Face, Flower, and Yin Yang. Staple patterns to craft foam at edges. Do not staple inside the areas you will be using. Cut out pieces, assemble and glue with tacky glue or craft foam glue. Glue suction cups in place with hot glue gun. Stick them on windows.

    Flowered Basket

    You need:

    • 18" x 24" Heavy Ivory Paper
    • Pink, Yellow, Purple and Green Letter Size Paper
    • Flowers: Print 2 each on yellow, purple, and pink
    • Leaves: 2 each on green
    • Tacky Glue
    • Scissors
    • Hole Punch (Optional)

    Instructions:

    Cut heavy ivory paper into approximately a 16" circle with a 7" circle drawn in the middle. The inner circle will be the basket bottom. Trim area around this into 1" radiating strips. Bend radiating strips up at dotted lines to begin to form basket side.

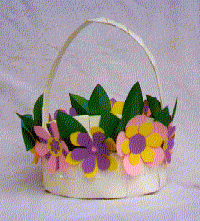
    Cut about eight 1" x 24" strips out of the same paper. Beginning close to the bottom of basket, weave one of these strips in and out of the radiating strips all the way around the basket. Cut off or add extra piece to complete first woven level. Secure ends with tacky glue. Weave two or three more levels.
    Fold or cut excess radiating strips even with the top level.

    To make the handle, wrap one of the precut strips (we'll call this the core) with another precut strip as shown:

    Secure ends with tacky glue. Continue with additional strips until the handle core is covered. Trim ends. Glue to inside of basket.

    Cut out flowers and leaves. Printed side will be the back of the flowers and leaves. Bend pieces up slightly on the dotted lines. This will add depth to the flowers. Assemble flowers by layering pieces. Use a small dot of glue in the center of each piece to secure. Punch out small circles with a standard whole punch for flower centers. Here are some examples of how your flowers could look:

    Glue the flowers around the basket. Glue on leaves, tucking them under flower petals.

    Worksheets